Use SSD as boot with Raspberry Pi 4
How to setup, connect and use an SDD with Raspberry Pi 4
Published: 19 Apr 2023
This guide assumes you have already an OS on your Raspberry Pi and using Raspberry Pi OS. It will still work with other OS, but some of the commands might need to be adjusted
Equipment needed
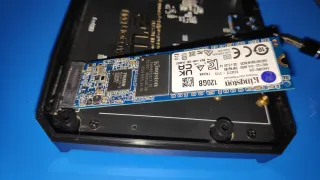
- SSD - SSD Adapter Cables or case that supports SSD (built in adapter)Method 1: Transfer existing OS to SSD
If you already have an existing OS running on the Pi, with files and setup. You might not want to loose it, so moving it can be a good alternativeUpdate System
Before proceed, it's good to ensure the OS is up-to-datesudo apt-get update
sudo apt full-upgrade
Check bootloader tool
Now we want to check that the bootloader is of a new enough versionsudo rpi-eeprom-update
If it returns something like below, you're on a new enough version to use SSD as boot. This support was added in release 2020/09/03, so you shouldn't have older than this
CURRENT: Thu 29 Apr 2021 04:11:25 PM UTC (1619712685)
Backup
Depending on how valuable your data is, you might want to do a backup of your data before proceedingSD Card Copier
Now that the update, cmdline.txt and [optional] backup is doneGo to start menu > Accessories > SD Card Copier
Select from where you're coping and to where
For us we selected Kingston
Press Start, you might be promoted This will erase all content on the device 'KINGSTON SA400M8120G'. Are you sure?. Click Yes
When it's done, it will say Copy Complete
Method 2: Clean install
Second option is to perform a clean installWe sometimes publish affiliate links and these always needs to follow our editorial policy, for more information check out our affiliate link policy