Raspberry Pi 4 B: Adding Raspberry Pi OS [from Android]
![Raspberry Pi 4 B: Adding Raspberry Pi OS [from Android]](https://www.bonty.net/images/stories/small/20210519_1001_60a4fefe8c898.webp)
After unboxing our Raspberry Pi and assembling it. We now want to add an OS to it
Raspberry Pi have an app you can download for your computer, where you format your SD card and then add the OS you want
If you don't have a computer available, it's also possible to it from your phone. We'll now look into the Android approach

Insert your SD card
If you're using phone or computer, you'll need a minimum 8GB SD card. Recommended is at least 16GB, preferably higherI have a 32GB I'll use with the Pi and the 16GB that came with the starter kit, I'll use elsewhere
If your phone and computer don't have an card reader, you'll need to acquire a card reader or borrow a device with card reader
Raspi Card Imager
First you'll need to go into PlayStore and download Pi SD Card ImagerAfter it's downloaded and installed, it will be called Raspi Card Imager
Raspi Card Imager
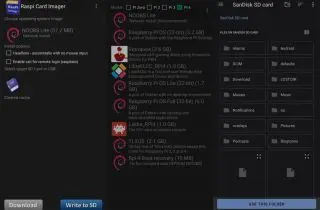
In the Raspi Card Imager, click on Operating system (default list NOOBS Lite (37.2 MB))Select OS
Now you get a list of available OS. As this app supports multiple Pi variants, you can select your model on top to narrow it down and as I have a Raspberry Pi 4, I checked Pi 4I went with the NOOB Lite
Select storage location
Click on the SD card symbol and select where you want to store the OS. As we've already inserted the SD card, we'll navigate to the root folder of the SD card and click Use this folder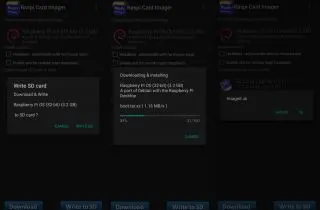
Download VS Write to SD
As you might have noticed, there's two options in the bottom Download and Write to SDDownload will as it say, download it to your phone. It won't apply it to the SD card
Write to SD will both download and apply it to the SD card. If it detects you already downloaded it, it will use the local copy
Now I press Write to SD and don't touch your phone while this is in progress or you might end up cancelling the job. When it's done, you'll get a confirmation Imaged ok

Insert SD card
Now that you've added the OS to the SD card, you can connect the Raspberry Pi to your screen and power it on
Rainbow screen
If you now see a rainbow screen and after waiting a bit, it never get's past it. It can mean one of two things, either your OS is corrupted or you're using the wrong HDMI port. For me it was the later and it took me a few hours to figure it out. As everything I found online indicated corrupted OS ( I lost count how many times I re-added the OS to the SD-card). You want to use the HDMI port next to the USB-C port (the one you use for power)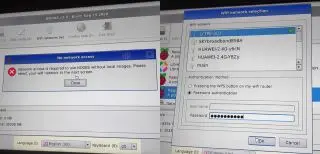
Connect to WiFi
If you selected NOOBS Lite, you'll now need to connect to network (WiFi or ethernet), to download the OSI choose WiFi, selected my preferred WiFi and logged onto it
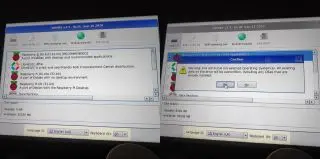
Select OS
Then select the OS you want to install and press installThis will download and install the OS
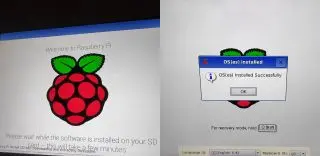
Raspberry Pi OS
We selected Raspberry Pi OS (previously called Raspbian), the official OS for the Pi. Now it's just wait for it to download and install. This can take some time, so it's a good time to fix some chores around the house while one wait
Welcome to Raspberry Pi OS
Now it's just to go through the a few last personalization steps, such as connecting to WiFi, setup password and check for updatesThen you're ready to roll