Raspberry Pi 4 B: Assembly
Now we've unboxed the Pi, let's assemble it

Published: 15 Jun 2021
After unboxing our Raspberry Pi. We now want to put it into a case, so it's more secure
Tools:
- Screwdriver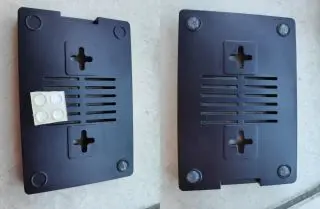
Feet
A good place to start, is adding the rubber feet to the case. This will make the case stand more sturdy and prevent slippingUnder the case you'll see spaces for the feet, it's just to stick the feet into these marked spaces and give it a push to make sure it sticks properly
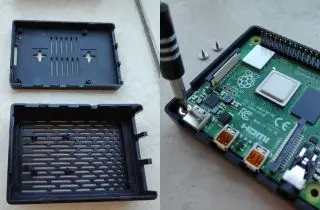
Open the case and insert the Pi
Now that the feet are on, it's time to open the case. Which can be done by gently pushing the sides and then pulling it upNow that the case is open, you can insert the Raspberry Pi. Align it with the cut out for different ports (USB, Audio, HDMI, etc) and then you can screw in the four screws to secure the board
Inspector
If the Inspector suddenly comes for a surprise visit, make sure to hide your contraband and prepare the bribes, to make sure the inspector leaves happy and don't report any issues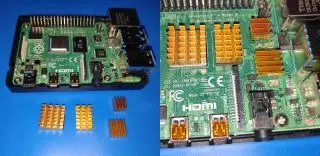
Heatsink
We got four heatsinks with this starter kit, but some kits contains less. Most kits contain heatsink for at least the Processor and the Ram. While mine also had for the ethernet controller and USB controllerIt can be a good idea to place them out, before removing the film. So you can see where to put them
Placing the heatsink
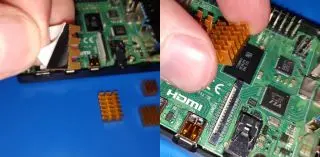
When you've decided where to place the different heatsinks, remove the protective film under and place them where you want them and press gently on top, so they stick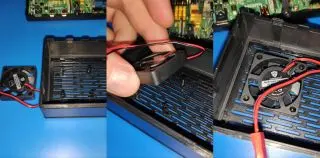
Fan
Now it's time to install the fan, in the lid of the case you'll find four poles. Here you'll just align them with the four holes on the fan and push it onNow you can decide if you want air to be pulled from the case or push air down onto the Pi. Here I decided to push air down onto the Pi
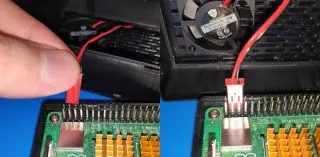
Fan Power
After the Fan is installed, it's time to connect power to the fan. Depending on what Fan you got and if you want 3V or 5V, the GPIO pins you use will be a little bit different. Here we went with the 5V and used corresponding GPIO pins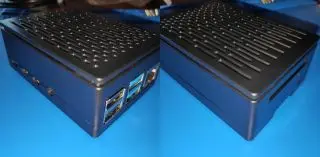
Pi is assembled
Now that the Raspberry Pi is assembled, you can connect the power cable, HDMI cable, keyboard and mouse. Before we can start using it, we will need to add an OSNext step is adding OS
We sometimes publish affiliate links and these always needs to follow our editorial policy, for more information check out our affiliate link policy