Argon One V2: Setup
How to setup Argon One V2
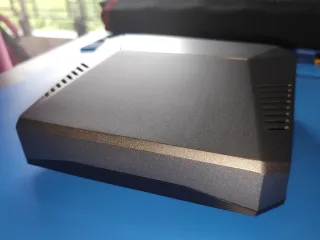
Argon One V1 vs Argon One V2
Argon One V1 and Argon One V2 looks the same, the main two differences is the ports in the back where Argon One V2 have two full sized HDMI, while Argon One V1 have two micro HDMI and that Argon One V2 supports IR built in
Both versions support the Argon ONE M.2 Expansion Board
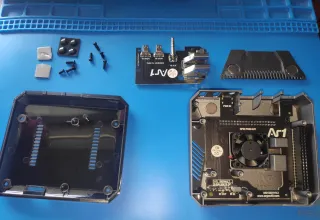
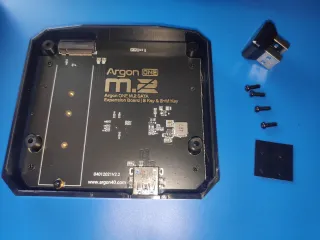
In the box
- Aluminum top part of the case, that also holds power button connected to a board that also houses an IR sensor and the fan
- Board you connect to the Raspberry Pi 4 to get two full sized HDMI and the audio jack in the back of the case
- The transparent plastic base
- 8 screws (two different lengths)
- Two thermal pads
- Four rubber feet
- Manual
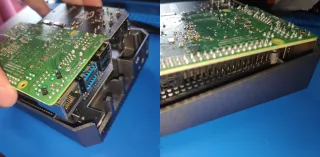
Insert HDMI/Audio board
Start by combining the board having the full size HDMI and audio jack, with the Raspberry Pi 4
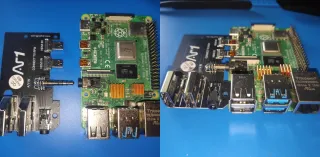
They need to go pretty far in, you can try to place it into the case to see if it fits, if you're unsecure if it's connected properly
Thermal pads
Place the thermal pads on the two metal points sticking out from the case
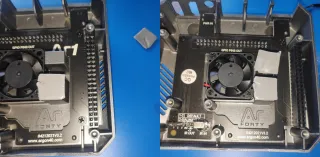
If you've used your Raspberry Pi 4 in another case, you might have heatsinks on the board. If you do, you need to remove them from the CPU and RAM, as these will align with the thermal pads we just placed
Align GIPO and ports
Now you want to align the GIPO and rear ports
Then put the board mostly straight down until properly connected
Short screws
Now we'll fasten the four shorter screws
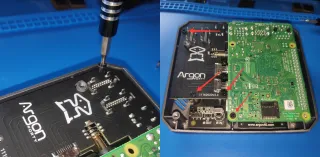
Three screws into the full-sized HDMI and audio jack board and one into the bottom Raspberry Pi 4 hole (see picture)
Applying rubber feet
Now apply the four rubber feet

There's four pre-defined slots for the feet
Put base on
Before putting base on, make sure no microSD card is connected
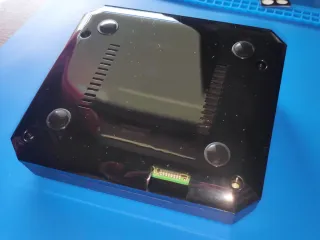
Now you can align the base and board and apply the longer four screws
GIPO Access
By removing the magnetic lid, you have access to GIPO

Power button and fan control
To install the fan controller and power button configuration, you will need to install the Argon ONE Pi 4 script by running below command in terminal
[snippet]curl https://download.argon40.com/argon1.sh | bash[/snippet]
Fan speed
After installing the Argon ONE Pi 4 script, the fan will run as below
CPU temperature of 55°C, will run fan at 10%
CPU temperature of 60°C, will run fan at 55%
CPU temperature of 65°C, will run fan at 100%
These levels can be adjusted in the configuration
[OPTIONAL] Argon ONE M.2?
If you have an Argon ONE M.2 Expansion Board, then we've this guide on how to setup the board and connect it
Tags: #RaspberryPi #Argon #ArgonONE


