How to wall mount modem and router
Most people today have a modem / router in their house, either as one box or two separate ones. Your ISP (Internet Service Provider) normally for new installations just put a hole in the wall, pull the cable and put your modem / router on the floor. Which can often take a lot of floor space
Things to consider
One mistake many make, when placing an router. Is that they put it on the floor or hide it, as they don't really want it to be seenYou want the router to be somewhat elevated and have decent free view, so the signal can go as far as possible. To ensure you have good connection in your entire home or at least as much as possible of it
Method 1: Screw mounts
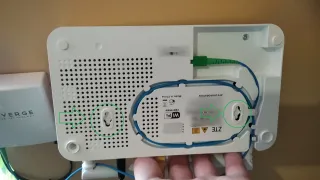
Most modems and routers today, have mounts underneath or in the back. Which you can use to hang it on the wall, all you need to do is put a couple of screws / nails in the wall and hang it up
Do note that not all devices have mounts. For the ones that don't, you might be able to find 3rd party solutions (clips) to add mounts or you can use Tack-It / Double sided tape, more on that in a bit
Preparing to hang it
Before starting to make screw holes, it's good to decide where to hang it and to create a template for the screw holes
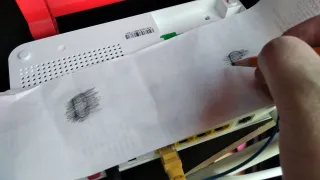
Here I took an old receipt and used the blank back side. Then took a pencil and moved it back and fort over the mounts, so they get drawn onto the paper. This will make it easier to get the correct distance between the screw holes
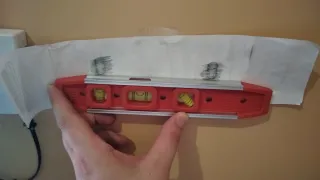
Now you can place it on the wall with some masking tape (or other tape) and if you want it really straight, you can use a level
Put the screws / nails
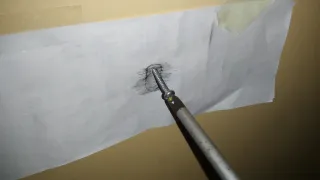
Now that it's on the wall, you can put the nails / screws in the markings we have. You might need to drill a hole first, depending on the wall material
Method 2: Non-screws (nails) alternative
If you don't want, can't or not allowed to use screws / nails, you can use Tack-It, double sided tape or other similar solution. Here you want to ensure you either put on the feet and other elevated parts or that it's big enough to reach past the elevated parts
After you have ensured both the wall and the bottom of the device is cleaned, especially no dust. Then it's just to start placing the Tack-It / Double sided tape / other material
From experience, Tack-It does a good job at holding up these kind of equipment. Just remember the first few days, you go over once in a while and push it to the wall. Just to ensure that it bonds properly
Of course, there's a weight limit to how heavy these kind of solutions manage to carry, here you need to read the labels or try it out, as it can vary greatly between different options
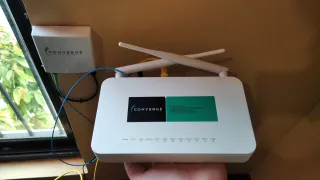
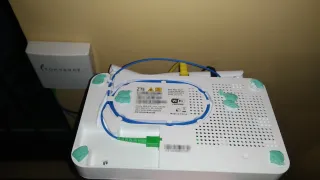
Router/modem is on the wall
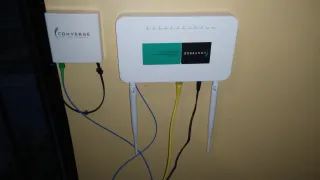
Now you have the modem / router on the wall and freed up some floor space. I have my modem & router combo install upside down, as I do not use the router part and just want the wires to go straight down
If you're going to use the router part (wireless part), you should consider having the antennas facing up / sideways. Depending on which directions you need the signal to go